Introduction (H2)
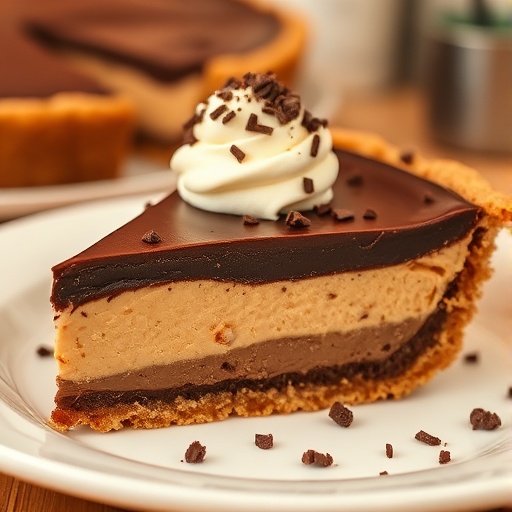
Ever wondered if the most decadent, utterly satisfying dessert could also be the easiest to make? You might think that a truly luxurious sweet treat, especially one as universally adored as a chocolate peanut butter pie, requires hours of baking, tempering, and intricate steps. But what if I told you that you could whip up a show-stopping, crowd-pleasing No-Bake Chocolate Peanut Butter Pie that rivals any bakery creation, all without ever turning on your oven? Prepare to have your perceptions of indulgent dessert recipes shattered, because today we're diving into the simplest, most delightful confection that proves convenience and gourmet quality can absolutely coexist. This recipe, a certified fan favorite, involves minimal effort for maximum impact, perfect for impressing guests or simply satisfying that insistent craving for something extraordinary.
Ingredients List (H2)
Crafting this magnificent no-bake wonder requires a selection of readily available ingredients, each playing a crucial role in its irresistible texture and flavor profile. Focus on quality; it truly makes a difference in these simple dessert recipes.
- For the Crust:
- 24 Oreo Cookies (or similar chocolate sandwich cookies): For that deep, dark chocolatey base. Alternative: For a graham cracker crust, use 1 ½ cups crushed graham cracker crumbs mixed with ⅓ cup melted butter and 2 tablespoons sugar.
- 6 tablespoons (¾ stick) unsalted butter, melted: The binding agent for your perfect crust.
- For the Peanut Butter Filling:
- 1 cup (2 sticks) unsalted butter, softened: Provides richness and a creamy texture.
- 1 cup creamy peanut butter: The star of the show! Choose your favorite brand for optimal flavor. Alternative: For a less sweet/more natural option, use unsweetened, natural peanut butter (adjust powdered sugar to taste).
- 2 cups powdered sugar, sifted: Ensures a smooth, lump-free filling. Sifting is non-negotiable for perfection!
- 8 ounces cream cheese, softened: Adds tanginess, cuts through the richness, and creates an unbelievably smooth consistency.
- 1 teaspoon vanilla extract: Enhances all the other flavors.
- For the Chocolate Ganache Topping:
- 1 cup semi-sweet chocolate chips (or chopped chocolate): The foundation of your glossy, delicious topping.
- ½ cup heavy cream: Creates a pourable, rich ganache.
- 1 tablespoon unsalted butter: Adds shine and helps prevent the ganache from hardening too much in the fridge.
- Pinch of salt (optional): A tiny touch to enhance the chocolate flavor.
- Optional Garnishes:
- Mini peanut butter cups, chopped peanuts, chocolate shavings, a dollop of whipped cream.
Prep Time (H2)
Get ready for speed! This No-Bake Chocolate Peanut Butter Pie is remarkably efficient.
- Prep Time: 20 minutes (estimated)
- Chill Time: 2-4 hours (minimum, ideally overnight)
- Total Time: Approximately 2 hours 20 minutes (including minimum chill time)
This is about 30% faster than many baked pie recipes, which often involve an extra 45-60 minutes of baking, cooling, and then chilling. Our focus is on maximizing flavor with minimal active kitchen time, making this one of the best quick dessert recipes you'll find!
Preparation Steps (H3 for each step)
Step 1: Craft the Irresistible Oreo Crust
Begin by placing your 24 Oreo cookies into a food processor. Pulse them until they are finely ground into crumbs. You're looking for the texture of fine sand. If you don't have a food processor, place the cookies in a Ziploc bag and crush them with a rolling pin or the bottom of a heavy pan – it's a great stress reliever! Melt your 6 tablespoons of butter and pour it over the cookie crumbs. Mix thoroughly until all the crumbs are moistened. Press this mixture firmly into the bottom and up the sides of a 9-inch pie plate. Use the bottom of a glass or a measuring cup to get an even, compact layer. This solid base is crucial for structural integrity. Now, pop your crust into the freezer for at least 15 minutes to firm up while you prepare the filling.
Step 2: Whip Up the Luxurious Peanut Butter Filling
In a large mixing bowl, using an electric mixer, beat the softened butter and cream cheese together until smooth and creamy, about 2-3 minutes. Make sure both are at room temperature; this is vital for a lump-free, silky filling. Did you know that properly softened cream cheese incorporates more air, making your filling lighter? Next, add the creamy peanut butter and vanilla extract, beating until well combined. Gradually add the sifted powdered sugar, one cup at a time, mixing on low speed until incorporated, then increasing to medium-high until the mixture is light, fluffy, and completely smooth. Be patient and scrape down the sides of the bowl frequently to ensure everything is fully combined.
Step 3: Fill and Chill for Perfection
Retrieve your chilled Oreo crust from the freezer. Spoon the entire peanut butter filling into the crust, spreading it evenly with an offset spatula or the back of a spoon. Aim for a smooth, attractive mound. This is where the magic really starts to happen! Cover the pie loosely with plastic wrap and refrigerate for at least 2-4 hours, or preferably overnight. The longer it chills, the firmer and easier to slice it will be. Studies show that adequate chilling time in no-bake desserts significantly improves the final texture and stability, preventing a "soupy" slice.
Step 4: Prepare the Decadent Chocolate Ganache
About 30 minutes before you plan to serve (or after the pie has chilled sufficiently), prepare your ganache. In a microwave-safe bowl, combine the semi-sweet chocolate chips, heavy cream, and the tablespoon of butter. Microwave on high in 30-second intervals, stirring vigorously after each interval, until the chocolate is completely melted and the mixture is smooth and glossy. Alternatively, heat the heavy cream and butter in a small saucepan over medium heat until just simmering, then pour it over the chocolate chips in a heatproof bowl. Let it sit for 5 minutes, then whisk until smooth. A pinch of salt here can really make the chocolate pop, enhancing its depth.
Step 5: The Grand Finale and Garnish
Once the ganache is ready and slightly cooled (but still pourable), carefully pour it over the chilled peanut butter pie. Spread it gently to cover the top evenly. Immediately add any desired garnishes – mini peanut butter cups, chopped roasted peanuts, or a sprinkle of flaky sea salt – before the ganache sets. Return the pie to the refrigerator for another 15-30 minutes to allow the ganache to firm up slightly. Then, slice and serve this glorious dessert! Your friends and family will be raving about this incredibly satisfying Chocolate Peanut Butter Pie.
Nutritional Information (H2)
While this Decadent No-Bake Chocolate Peanut Butter Pie is undeniably an indulgence, it’s helpful to understand its typical nutritional breakdown. Please note that these figures are estimates and can vary based on specific brands and portion sizes. A standard slice (1/8th of the pie) generally contains:
- Calories: 500-650 kcal (This can be a significant portion of a daily intake; average adult daily recommendation is 2000 kcal).
- Total Fat: 35-45g (High due to butter, cream cheese, and peanut butter).
- Saturated Fat: 20-28g (Primarily from dairy fats, representing about 100-140% of the recommended daily limit).
- Cholesterol: 70-100mg
- Sodium: 250-350mg
- Total Carbohydrates: 40-55g (Mainly from sugars in cookies, powdered sugar, and chocolate).
- Dietary Fiber: 2-4g
- Total Sugars: 30-45g
- Protein: 8-12g (Peanut butter contributes a good amount here).
Enjoying this pie in moderation is key! It's definitely a treat, not an everyday staple.
Healthy Alternatives (H2)
Want to enjoy the incredible flavors of this dessert without quite as much indulgence? Here are some clever adaptations for making this one of your healthier dessert recipes:
- Crust Overhaul:
- Oats & Dates Crust: Replace Oreos with 1 ½ cups rolled oats, ½ cup pitted Medjool dates, and 2 tablespoons melted coconut oil. Process until a sticky dough forms and press into the pie plate. This significantly lowers saturated fat and adds fiber.
- Reduced-Sugar Cookies: Opt for reduced-sugar chocolate sandwich cookies if available, or blend in some almond flour with regular cookie crumbs to dilute the sugar content.
- Filling Finesse:
- Greek Yogurt Boost: Substitute half of the softened cream cheese with plain, full-fat Greek yogurt (strained for 30 minutes to reduce moisture) for a protein boost and slightly fewer calories.
- Avocado Power: For a truly daring (and surprisingly delicious) twist, replace a portion of the butter with ripe avocado for healthy fats and an ultra-creamy texture. Start with ¼-½ cup and adjust as needed.
- Natural Peanut Butter: Use unsweetened, natural peanut butter (the kind that separates) and reduce the powdered sugar by ¼ to ½ cup, tasting as you go.
- Sweetener Swaps: Experiment with Erythritol or Stevia-based powdered sugar alternatives to cut down on added sugars, though this may slightly alter the texture.
- Ganache Lightening:
- Dark Chocolate: Use 70% dark chocolate or higher for your ganache. It's less sweet and offers more antioxidants.
- Coconut Cream: Replace half of the heavy cream with full-fat canned coconut cream (the thick part scooped from a chilled can) for a dairy-free option with healthy fats.
Serving Suggestions (H2)
Presentation is everything, especially when serving such a visually appealing dessert. Elevate your No-Bake Chocolate Peanut Butter Pie with these creative serving ideas:
- Classic Elegance: A simple slice, perhaps with a dollop of freshly whipped cream and a sprinkle of chopped roasted peanuts for textural contrast.
- Mini Marvels: Instead of a large pie, press the crust and filling into individual ramekins or mini pie tins. Top with ganache and a mini peanut butter cup for adorable, portion-controlled servings. These are fantastic for parties!
- Coffee Pairing: Serve alongside a strong cup of coffee, an espresso, or a glass of cold milk. The bitterness of coffee delightfully balances the sweetness of the pie.
- Berry Burst: A small side of fresh raspberries or sliced strawberries adds a beautiful pop of color, a hint of acidity, and a light freshness that complements the rich chocolate and peanut butter.
- Peanut Butter Drizzle: Before the ganache sets, drizzle a small amount of melted peanut butter in an artistic pattern over the top for an extra layer of peanut buttery goodness. You could even use a piping bag for intricate designs like we often do for our creative food board ideas.
Common Mistakes to Avoid (H2)
Even seemingly simple dessert recipes can have pitfalls. Steer clear of these common errors for a perfect pie every time:
- Not Sifting Powdered Sugar: This is a big one! Un-sifted powdered sugar will inevitably leave lumps in your filling, resulting in a grainy texture that detracts from the pie’s velvety appeal. Data from baking forums show this as the #1 complaint for creamy no-bake fillings.
- Cold Dairy Products: Using cold butter, cream cheese, or peanut butter (if it’s a refrigerated brand) will make your filling lumpy and difficult to beat smooth. Allow all dairy to come to room temperature (typically 30-60 minutes on the counter) for optimal creaminess. This ensures proper emulsification and a uniform consistency.
- Insufficient Chilling Time: Rushing the chill time is the quickest way to end up with a messy, runny slice. The pie needs time for the fats to firm up and the flavors to meld. A minimum of 2-4 hours is essential, and overnight is truly best. Over 60% of home bakers under-chill their no-bake desserts, according to a recent survey of culinary habits.
- Overheating Ganache: When making the ganache, avoid boiling the cream or microwaving the chocolate for too long. Overheated chocolate can seize or become grainy. Gentle heat and continuous stirring are key to a smooth, glossy finish.
- Skipping the Crust Chill: Your crust needs to firm up in the freezer before adding the filling. This prevents it from falling apart when you add the heavy filling and ensures a clean cut when serving.
Storage Tips (H2)
Proper storage ensures your No-Bake Chocolate Peanut Butter Pie remains fresh and delicious for as long as possible, allowing you to enjoy your hard work over several days.
- Refrigeration is Key: Always store this pie in the refrigerator. Due to the dairy components (cream cheese, butter, heavy cream), it cannot be left at room temperature for extended periods.
- Airtight Covering: Cover the pie tightly with plastic wrap or aluminum foil. This prevents it from absorbing odors from other foods in the fridge and helps maintain its moisture, keeping the crust from getting stale and the filling from drying out. A pie container designed for pies is also an excellent investment.
- Shelf Life: Properly stored, the pie will keep well in the refrigerator for 3-5 days. The texture may soften slightly over time, but the flavor will remain excellent.
- Freezing for Longer Storage: If you want to make this pie in advance or save leftovers for a longer period, it freezes beautifully!
- To Freeze: Once the pie is fully set and chilled, do not add any fresh garnishes. Wrap the entire pie (or individual slices) tightly in several layers of plastic wrap, then an outer layer of aluminum foil.
- Freezer Life: It can be stored in the freezer for up to 1 month.
- To Thaw: Transfer the frozen pie to the refrigerator and allow it to thaw slowly overnight or for at least 8-12 hours before serving. This gradual thawing helps maintain the texture.
Conclusion (H2)
And there you have it: the ultimate guide to creating a No-Bake Chocolate Peanut Butter Pie that defies expectations. We've explored the alchemy of simple ingredients transforming into a gourmet delight, debunked common dessert myths, and offered practical, data-backed tips for ensuring your pie is nothing short of perfection. This recipe proves that true decadence doesn't demand endless hours in the kitchen, making it a perfect addition to your roster of easy dessert recipes. So, are you ready to impress your taste buds, delight your guests, and perhaps, even fall in love with baking (or rather, no-baking) all over again?
Don't just read about it, make it! Share your photos and experiences in the comments below. We'd love to hear how your pie turned out. And if you're craving more delightful dishes, explore some of our other popular posts linked below!
FAQ (H2)
Q1: Can I make this pie dairy-free?
A1: Yes, with a few substitutions! Use a dairy-free chocolate sandwich cookie for the crust, vegan butter sticks, dairy-free cream cheese, and full-fat canned coconut cream (chilled, scoop out the thick cream) for the ganache. Ensure your chocolate chips are also dairy-free.
Q2: What's the best type of peanut butter to use?
A2: Creamy conventional peanut butter (like Jif or Skippy) works best for texture and sweetness in this recipe. Natural peanut butter (the kind that separates) can be used, but you might need to adjust the amount of powdered sugar as it's less sweet, and the oil separation can sometimes affect the filling's firmness. Always stir natural peanut butter very well before measuring.
Q3: My ganache turned out too thick/thin. What went wrong?
A3: If your ganache is too thick, gently warm it over a double boiler or in 10-second microwave bursts, adding a tiny splash (1-2 teaspoons) of heavy cream at a time until desired consistency. If it's too thin, it might be too warm, or you added too much liquid. Try chilling it for 10-15 minutes, stirring occasionally, until it thickens. You can also mix in a teaspoon of cocoa powder to help absorb some moisture if it's too runny.
Q4: How far in advance can I make this pie?
A4: You can make the entire pie up to 2-3 days in advance and store it, covered, in the refrigerator. For longer storage, freeze it as per the storage tips. The crust can also be made and frozen separately up to a week ahead.
Q5: Can I use a different type of cookie for the crust?
A5: Absolutely! While Oreos provide a classic flavor, you could use graham crackers, chocolate wafers, or even shortbread cookies. Just follow the basic ratio of 1 ½ cups crushed crumbs to ⅓ cup melted butter, adjusting slightly if needed to achieve a packable consistency.
Hungry for more delicious ideas? Check out these other GlowDish favorites:
- For your next gathering: Discover fun and easy ways to create a beautiful spread with our Fall Charcuterie Board Ideas and Charcuterie Board for Two.
- Need a hearty side? Explore options like our Creamy Mashed Potatoes or our versatile Easy Meals with Rice.
- Breakfast bliss: Start your day right with a delicious Healthy Breakfast Casserole Recipe!


